Sunday, November 16, 2014

Homemade mochi ice cream!

Brownie here! It's been a whirlwind fall--I married my longtime taste-tester in August and am working on proposing my dissertation--there hasn't been opportunity for much baking!

Pro tip: let them refreeze before slicing!
We'd both been craving some Japanese treats and so I ventured to our local Japanese market, and there I spotted Shiratamako flour, made from pounded sweet rice. We had tried making mochi with Mochiko flour before and hadn't been successful, although I attribute that to my possessed college microwave. I had read that using Shiratamako was a little more fool-proof, and it seems the internet was right (as usual).

You can use Shiratamako to make a variety of mochi treats, but I wanted to make mochi ice cream--and since I was making it myself, I was able to use lactose-free ice cream. These are naturally gluten-free as well, although you should ensure that your shiratamako and potato starch aren't processed in the same place as wheat products if this is an issue for you. Mochi ice cream isn't particularly Japanese, but you get the delicious chewy mochi texture all the same. I adapted a recipe from Just One Cookbook to suit my needs.

To make about 12 mochi, you'll need:
  • 1.5 cups ice cream in your favorite flavor--strawberry and green tea are typical flavors (I only had vanilla)
  • 3/4 cup (about 100 grams) Shiratamako flour
  • 3/4 cup water
  • Scant 1/4 cup white sugar (depending on how sweet you like your mochi)
  • Approximately 1/2 cup potato starch (you could substitute corn starch if need be) 
And some tools:
  • 1-inch cookie scoop (you could go up to 1.5 and the ratio would still be good)
  • Muffin liners
  • Rolling pin
  • Stiff rubber spatula
  • Thin wire whisk
  • Microwave (1000-1500 watt)
  • Round-ish cutter, 2.5-3 inches in diameter
At least an hour ahead of time, scoop 1-inch hemispheres of ice cream into the muffin liners and put in the back of your freezer until firm.

Mmmm...gluey...
Combine your shiratamako, sugar, and water in a 2-quart (or larger) microwave-safe bowl, whisking thoroughly. You might have some parts that seem undissolved; everything will come together once you heat it. It should look like slightly gluey pancake batter (how appetizing!).

Cover with plastic wrap (make sure the wrap is well above the food) and microwave on high for 1 minute. Wet the rubber spatula and beat the mixture, folding it back and forth to break up the emerging lump in the middle.

Microwave on high (still covered) for 1 more minute. The mixture should look uniform. Beat with the spatula again, and return to the microwave for 30 more seconds (covered). The mixture should look more translucent than before, and should be very glutinous and sticky. Caution--the mixture will be VERY HOT in the center and it can stick to your hands and burn you, so be very careful with these next steps.
Pie crust thickness!

Cover your work surface with some foil or a cookie sheet, and dust about 1/4 cup of the potato starch over it. Scrape the dough out onto the potato starch and dust a little more over the top and on your rolling pin. Roll the dough out to the thickness of pie crust--about 1/4 to 1/8 inch. Don't worry if you can't get it that thin right away--it's a bit easier as it cools. Stash it in the back of your fridge for 15-20 minutes.

I don't own round cutters, so I used a tartlet pan.

Take the dough out of the fridge and start cutting out your rounds--you'll probably get 6-8 out of your first pass. Then take the scraps and pinch off 1-inch balls of dough. It's easier to roll out these balls individually than to combine the scraps into one mass--too much potato starch will stop it from coming together. Roll out into rounds the same size as your cut rounds.
Give the mochi an ice cream hat!

Working with one ice cream ball at a time, tip it out onto a prepared mochi circle and gather up the dough around it. You can end with the seams on top (like a dumpling) or try to hide them on the bottom.

I think dumpling-style is prettier.
If they're sticky at all, roll your finished mochi in more potato starch. You can return the mochi ice cream to the muffin liner or another container and store in the freezer.


The finished product


Friday, August 22, 2014

What's Baking?: Cassatedde


It's time for another What's Baking? entry!  This month, Ali from Sparks from the Kitchen challenged us to make a dish celebrating our heritage.  The largest part of my background is Italian, so that's where my mind immediately went.  Plus, I mean, there's a huge list of delicious Italian pastries to choose from!  I've already made pignoli, tiramisu, amaretti, and pasticiotti, so I obviously like Italian desserts...the trick was finding one that I haven't made before!  I was perusing Cooking With Nonna to get some ideas, and cassatedde jumped out at me.  They looked like cannoli, which I love, but without the need for cannoli forms, which I don't have.  Now, as it turns out, they're rather different from cannoli, but still very delicious!  A flaky pastry is filled with a slightly sweetened mixture of ground almonds and ricotta...how could it be bad?!  If you're looking for an Italian pastry that's a little bit different, I highly recommend cassatedde.


Cassatedde (adapted from Cooking with Nonna)

  • 1 lb. flour
  • 2.5 oz. shortening
  • 5 oz. sugar, divided
  • 1 egg plus 1 yolk, divided
  • 3/4 c. white wine
  • 1 lb. ricotta
  • 1/4 lb. almond flour (you can substitute 1/4 lb. of almonds ground in a food processor, but the filling will not be as smooth)
  • Splash of almond extract

In a stand mixer, mix the flour, shortening, 2 oz. sugar, 1 egg yolk, and white wine until a dough forms.  You may need a tad more than 3/4 c. wine.  Wrap the dough in plastic wrap, and let it rest for at least 1 hour.

Meanwhile, combine the ricotta, almond flour or ground almonds, almond extract, and remaining 3 oz of sugar.  Refrigerate the filling until it is needed.  Take the remaining egg and scramble it with a little bit of water.

Roll the dough out to about 1/16" thick--it needs to be pretty thin.  Cut out 3" rounds.  Brush the edges with the egg wash, and fill with about half a tablespoon of filling.  Fold it over, and seal the edges.  An empanada press works great for this.

If baking the cookies, brush with canola or spritz with cooking spray, and bake at 375*F for 7-10 minutes, or until crispy.  If frying, fry the cookies at 375*F for 3 minutes or until golden brown.  If desired, dust with powdered sugar when cool.  As written, the recipe makes about 5 dozen cassatedde.

Monday, July 14, 2014

Roasted Cherry Chocolate Pie

The other day, I was browsing around Confections of a Foodie Bride (she has some AMAZING margarita and burger recipes...yum!), and I came across this recipe for a roasted cherry brownie sundae.  I love cherries, and they go brilliantly with chocolate, so this recipe got filed away in my mental recipe box.  Fast forward a few days.  It was a friend's birthday, and she loves chocolate.  I wanted to make her something decadent and chocolatey, but I also wanted it to be easy and quick to make, because we were celebrating her birthday on a Wednesday, so it would have to be made after work on Tuesday.  I decided on a chocolate pie, because pies are easy and delicious.  But chocolate pie seemed too plain.  And then I remembered the roasted cherry brownie sundaes.  And decided to stir the roasted cherries into my chocolate pie filling.  This, my friends, was a very good idea.  So good of an idea, in fact, that the pie was devoured in its entirety, before I had a chance to take a picture.

But really, the pie didn't look all that pretty anyways, because I dropped it as I was getting into my car.  Go me.  Thankfully, the lid stayed on, so all the contents stayed inside the pan.  It was just a little...shaken up.  Anyway, you should make this pie.  And try not to drop it.  And try not to eat it all in one sitting.  I dare you.

Roasted Cherry Chocolate Pie (adapted from Epicurious and Confections of a Foodie Bride)

  • 1 lb. sweet cherries
  • 1/2 c. port
  • 2/3 c. sugar
  • 2 Tbl. cocoa powder
  • 2 1/4 c. milk
  • 1/4 c. cornstarch
  • 1/2 tsp. salt
  • 6 egg yolks
  • 6 oz. semisweet chocolate chips
  • 1 tsp. vanilla
  • 1 chocolate graham cracker pie crust (store bought or homemade)
  • 1 c. heavy cream
  • 2 Tbl. powdered sugar
  • 1/4 tsp. almond extract

Remove the pits from the cherries, and cut them in half.  Combine them with the port in an oven-proof baking dish.  Roast at 425*F for 30-40 minutes, or until the cherries are soft and the port has reduced to about 1/4 c.  Remove from oven and drain the cherries, reserving the liquid.

Whisk together the sugar and cocoa powder in a saucepan.  Add the port and milk, whisking to combine.  Heat over medium heat until just steaming.

Meanwhile, whisk together the cornstarch, salt, and egg yolks until thoroughly combined.  Slowly whisk in about 1 c. of the steaming milk mixture, to temper the eggs.  Add the egg mixture back into the saucepan and cook over medium-low heat until the mixture thickens significantly.  Be careful not to boil it to avoid scrambled eggs.  Remove the pudding from the heat, and stir in the vanilla, cherries, and chocolate chips until chocolate chips are melted.  Pour into the chocolate graham cracker pie crust.  Note: if you use one of the store-bought ones, you will have some filling left over, since they're closer to 8" than 9".  If you make a 9" one at home, you will not have filling left over.  Let cool for about 5 minutes, and then press plastic wrap down onto the surface of the pudding to prevent a skin from forming.  Refrigerate for at least 3 hours, preferably overnight, until set.

Combine the heavy cream, powdered sugar, and almond extract, and whip until stiff peaks form.  Spread the whipped cream over the top of the pie.  Enjoy!

Tuesday, July 8, 2014

Peanut Butter Bourbon Bacon Blondies

There's a fantastic local BBQ joint near the Husband and me...it's owned by a guy who has been a chef at a lot of the top local restaurants.  He's a classically trained French chef, but he got tired of doing the fancy food, so he started a BBQ restaurant.  He brings all the same attention-to-detail that high-end cuisine requires to a very unfussy local hangout.  And it shows.  You can drive by this place at 2:00 on a Tuesday afternoon, and it's packed.  Because of his extensive culinary experience, the chef comes up with some interesting desserts, too!  We once had some bacon brownies there (delicious), and last time we were there, the Husband had a doughnut topped with peanut butter frosting, bacon, and a chocolate drizzle.  Now, I'm not big on either doughnuts or bacon, but it was an interesting combination.  Fast forward a few weeks, and when the Husband requested that I make peanut butter blondies, well, I knew how I was going to jazz them up!  These blondies were a huge hit--the perfect balance of salty and sweet!


Peanut Butter Bourbon Bacon Blondies (adapted from my mom's blondie recipe)

  • 1/3 c. butter
  • 1 c. brown sugar
  • 1 Tbl. bourbon
  • 1 egg
  • 1 tsp. vanilla
  • 1 c. flour
  • 1/2 tsp. baking powder
  • 1/8 tsp. baking soda
  • 1/2 tsp. salt
  • 6 oz. bacon, cooked and crumbled
  • 6 oz. Reese's minis, chopped (or Reese's pieces)

Melt butter, and mix in brown sugar until well-combined.  Cool slightly, then stir in the bourbon, egg, and vanilla until thoroughly mixed.  Whisk together the flour, baking powder, baking soda, and salt, then stir it into the wet ingredients until a few streaks of flour remain.  Lastly, add the bacon and Reese's, and stir gently until just mixed.  Spread into a greased 8x8 pan, and bake at 350*F for 25 minutes.  Enjoy!

Monday, June 30, 2014

Strawberry Shortcake in a Glass

Remember when I made those watermelon rum-aritas two years ago?  No?  Well, you should re-visit the recipe (and try it with jalapeño-spiked rum or tequila while you're at it...trust me).  One of my favorite things about that recipe is that it uses fresh fruit, liquor, and not much else--no soda or syrups, and it uses whole fruit, rather than juice, so you get more nutritional value.  Yes, I referred to the nutritional value of a cocktail.  I can rationalize anything.  Keep reading.


This next recipe falls in the same vein.  It has 3 simple ingredients, two of which are healthy!  The third is vodka.  How could you go wrong?  This is a beautifully sweet way to cap off a meal.  It also makes a great afternoon snack (hey, it's 5 o'clock somewhere, right?) because it's very filling.  And it quite literally tastes like strawberry shortcake in a glass.  Don't let strawberry season pass you by without giving this a whirl (pun intended)!

Strawberry Shortcake in a Glass (a Blondie original)

  • 1 pint fresh strawberries, washed and hulled
  • 1 to 1 1/4 c. milk (skim works, whole tastes richer)
  • 1 c. cake vodka (we like Pinnacle, but I'm sure other brands work, too)
  • 3 basil leaves (optional)

Combine strawberries, milk, vodka, and basil leaves (optional) in a blender.  You can adjust the amount of milk depending on how creamy you would like it.  Blend until smooth, and then drink up!  Makes about 4 glasses.

Tuesday, June 24, 2014

What's Baking?: Walnute Nectarine Muffins

*Blows dust off blog*  Wow, has it ever been a while.  Suffice to say, between work and life, I haven't had a lot of time to be blogging lately!  When the What's Baking? group threatened to kick me out for lack of participation (ooops, sorry guys!), I figured I should get my behind in gear and get a post written.


This month's challenge, brought to you by Yudith of Blissfully Delicious, was to bake using summer produce.  Now, I don't know about you, but one of my favorite parts of summer is all of the fresh produce!  Watermelons, berries, peaches, plums, cherries--don't make me pick, I love them all!  But for this recipe, I'm using nectarines, because they were on sale at my grocery store.  Grocery store, you ask?  Not Farmers' Market?  Let me tell you.  You would think, given that I live in a rural area, that there would be a lot of Farmers' Markets or other opportunities to buy fresh produce.  Do you want to know what the ONLY stall at my Farmers' Market last week was selling?

Funnel cakes.

Yup, funnel cakes.  Nothing else.  No tomatoes, no cucumbers, no zucchini, and certainly no fruit.  So, grocery store, it is.  I will be scouting various other Farmers' Markets over the next couple weeks in hopes of finding one that actually sells *gasp* produce!  In the meantime, Husband (yup, he graduated from Fiancé!) and I will be enjoying these nectarine walnut muffins for breakfast.  We took his mom's basic muffin recipe and adapted it, and they turned out deliciously!  You could make these with any fruit you wanted, truly, although you'll have to play with the amount of milk, based on how juicy your fruit is!  I'm thinking they would also be delicious with white chocolate chips substituted for the walnuts....


Nectarine Walnut Muffins (adapted from Shirley)


  • 3 1/2 c. flour
  • 2/3 c. sugar
  • 1/2 tsp. salt
  • 2 Tbl. double-acting baking powder
  • 2 eggs
  • 2/3 c. vegetable oil
  • 1 1/4 c. milk
  • 2 tsp. vanilla
  • 3 nectarines, diced (peeling is optional--I didn't bother)
  • 1 c. chopped walnuts

In a medium bowl, whisk together the flour, sugar, salt, and baking powder.  Add the eggs, oil, milk, and vanilla, and mix until mostly combined.  Gently fold in the nectarines and walnuts until they are incorporated and no streaks of flour remain.  Divide batter evenly among 12 jumbo muffin tins (or 24 normal-sized ones).  Bake at 375*F for 20-25 minutes for jumbo muffins or 15-20 minutes for normal-sized muffins.  Muffins are done when a toothpick inserted into the center comes out clean.

Wednesday, September 11, 2013

The Cherpumple...errr...Chersweetby?

Brownie here!  It's been a very busy few months for me so most of my baking went unphotographed, but next week is the boyfriend's 26th birthday and after I had told him of the existence of the
His favorite color is green
Cherpumple
, he told me he would request one every year until I made him one.  Now, I live by myself, and consuming the remainder of 3 pies and 3 cakes sounded like an insane feat, so I sought to make a mini version of the cherpumple, something a few people could manageably eat.

For those of you who don't know, the cherpumple is a monstrous creation, 3 layers of pie (cherry, pumpkin, and apple, respectively)-stuffed-in-cake.  These things are ginormous.  I decided to use a birthday gift from the boyfriend's sister, this cute tiered cake pan, and make a smaller version.  Normally I do from-scratch baking, but a paper deadline and the enormity of this task required a few compromises...

To make my version, you'll need:

1 4-inch cherry pie (I bought mine from the freezer section because I only had so many tiny pie tins)

Clockwise from left--sweet potato, Kentucky Derby, and cherry
Ingredients for Joe Pastry's Pumpkin Pie, subbing sweet potato for the pumpkin puree, subbing evaporate milk for both the milk and the cream, and scaling it up by 25% if you want to make a spare pumpkin pie, or making only 1/4 of the recipe if you just want the mini ones.

Ingredients for Joe Pastry's Kentucky Derby Pie (I ended up using 1.5 pie crusts for this because using smaller containers contains less volume per crust amount)

1 box yellow/vanilla cake mix, plus the eggs/oil/water it calls for
Spices of your choice (I used 1 Tbl cinnamon, 1 tsp nutmeg, and 1/2 tsp cloves)
Chocolate pudding mix/cocoa-sugar blend (to turn vanilla cake into chocolate; pure cocoa just gets too bitter).

1.5 cups butter, softened
~3 cups powdered sugar
1.5 tsp salt
2/3 cup dark spiced rum

Two days ahead, make the pumpkin pies.  I used something like these mini ramekins that I bought at an estate sale ages ago.  They're a bit deep-dish but that works out well for the cake pan.  Obviously in the small pans they bake a lot faster--mine were done in 10-15 minutes.  Put cooled pies in the freezer.  Eat the big one if you made it--it's a great recipe.

One day ahead, make the Kentucky Derby pies.  I baked these in tartlet pans (I bought mine on Amazon from Fox Run; you want to use ones without a false bottom unless you're really confident in your pie crust since syrup pies can leak) and again shortened the baking time.  Freeze the cooled pies.

Leave some space for them to rise!
The day of, make the cake mix according to the package directions, and divide it into 3 bowls, but not evenly--one bowl should have about 1/5 of the batter (this will be chocolate), and the remaining two will split what's left, with a little extra going to the plain flavor (the medium amount is for the spice cake).

Add the spices of your choice to the spice one, and the chocolate putting mix or cocoa-sugar blend to the chocolate (to taste), and prep your pan by cutting out solid circles for the bottom tier and rings for the upper 2 tiers. You could also spray and flour the pan thoroughly.

Cut the frozen cherry pie into 4 wedges (no more than 1 inch in diameter). Drop a wedge inside each cavity, and top with the chocolate batter. Repeat with the pumpkin and the spice batter, and then finally top with the Kentucky Derby pie and yellow batter (careful not to overfill).  Conveniently, the chocolate batter will be the thickest, so you shouldn't have much trouble with things blending together--my layers were quite distinct.

The glory shot
Bake according to the package directions, and test by springiness rather than a toothpick so you don't misinterpret pie goo as raw batter.  Let cool thoroughly and then invert for 1 hour or so, hoping that the cakes fall out. They might break into the 3 layers but that just gives you more opportunity for frosting.  Refrigerate (or if you want to do a crumb coat, freeze) until ready to frost.

To make the frosting, reduce 1/2 cup of rum in a pan by half, while blending the softened butter with 1/2 cup of the sugar. Alternate the reduced rum and remaining sugar, and then whip in the un-reduced rum (replacing the milk in a normal buttercream). Try to get the buttercream as airy as possible (using whisk attachment) since the cake is so rich.

Frost the cakes (I did a crumb coat and then froze again), then slice carefully and wow all your friends!


Tuesday, July 30, 2013

What's Baking?: Creamsicle Bundt Cake

I'm alive!  I haven't forgotten about the blog, I swear!  I had a REALLY busy spell at work, so I had to take a break, but I am (hopefully) back in action now!  And, I happen to be just in time for another What's Baking? challenge!


This month, Ange from The Tiny Tyrant's Kitchen challenged us to bake our favorite cocktail.  Um, yum!  This was right up my alley.  And, I knew right away what I wanted to make.  The Fiancé and I have been big fans of the flavored vodkas ever since they came our, but hands-down, our favorite one is whipped cream vodka.  We can go through a liter of that stuff embarrassingly quickly!  He loves to mix it with coke (tastes like vanilla coke) or strawberry soda, while my favorite mixers are root beer (mmmmm, root beer float) or orange soda (hello, creamsicle).  And when I saw this cherry lime cream cheese bread, I knew I could adapt the recipe to highlight the whipped cream vodka and orange flavors.  I ended up using orange juice in this recipe, so it's a much more natural orange flavor, but you could certainly use orange soda to get more of the creamsicle flavor.  This cake was a big hit, and The Fiancé enjoyed taking slices of it to work for breakfast!  I hope you like it as much as we did!


Creamsicle Bundt Cake (heavily adapted from My Baking Heart)

Cheesecake layer
  • 16 oz cream cheese (reduced fat is fine), softened
  • 1/2 c. sugar
  • 2 eggs
  • 2 Tbl. flour
  • 1/4 c. whipped cream vodka

Cream together the cream cheese and sugar until smooth.  Beat in the eggs, one at a time.  Next, beat in the flour.  Finally, mix in the whipped cream vodka.  Set aside.

Cake layer
  • 1 c. butter, softened
  • 1 c. sugar
  • 4 eggs
  • 2 tsp. vanilla
  • Zest of 2 oranges
  • 3 c. flour
  • 1/2 tsp. salt
  • 2 tsp. baking powder
  • 1 tsp. baking soda
  • 2/3 c. orange juice (or orange soda)

Cream together the butter and sugar until smooth.  Beat in the eggs, one at a time.  Beat in the vanilla extract and the orange zest.  In a separate bowl, sift together the flour, salt, baking powder, and baking soda.  Stir about half of this into the butter mixture, until just combined.  Mix in the orange juice.  Finally, beat in the remaining flour mixture until just combined.

Pour about half of the cake batter into a greased bundt pan.  Top with the cheesecake batter.  Cover with remaining cake batter, and carefully smooth the cake batter over the top so that none of the cheesecake batter is showing.  Bake at 350*F for ~70 minutes, or until a toothpick inserted in the middle comes out clean.  Cool completely, and remove cake from bundt pan.

Glaze
  • 3 c. powdered sugar 
  • 2 Tbl. melted butter
  • 3-4 Tbl. whipped cream vodka

Stir melted butter and about 2 Tbl. of whipped cream vodka into the powdered sugar.  Continue to add the whipped cream vodka, a little bit at a time, until glaze reaches a thick but pourable consistency.  Pour over top of the cooled cake.

Monday, April 22, 2013

War Cake

For our All In challenge this month, in honor of tax day, we were supposed to make something budget-friendly.  Budget-friendly isn't usually my strong suit, so I was brainstorming ideas with the Fiancé, and he suggested war cake.  I hadn't heard of it before, but Wikipedia tells me "Depression cake is a type of cake that was commonly made during the Great Depression. The ingredients include little or no milk, sugar, butter or eggs, because they were then either expensive or hard to get. Similar cakes are known as "War Cake," as they avoided ingredients that were scarce or were being conserved for the use of soldiers."  Sounds like it should fit the budget-friendly bill!

We used the Fiancé's mother's recipe, and sure enough, there was no milk or eggs in the recipe, but it did include shortening and sugar.  Thankfully, sugar is cheap these days and isn't being rationed, so that's not an issue.  As for the shortening, well, I apparently wasn't entirely "with it" while baking and completely forgot to add the shortening.  The cake turned out alright--a bit chewier than I'm used to and probably a bit drier than it would have been with the shortening, but still tasty.  So, feel free to leave it out, if you want, but I'd bet money that it's better with shortening.


We chose to frost the cake with cream cheese frosting because I love cream cheese frosting and any excuse to make/eat it, but you could just dust it with powdered sugar to keep things a little more budget-friendly.  The spices are also adaptable to what you have on hand, so you don't have to go out and buy spices--you could easily leave out the cloves, or substitute both the cloves and the cinnamon with 2 tsp. of pumpkin pie spice or apple pie spice, or substitute some allspice, nutmeg, and/or ground ginger for one or both of the spices.  The rest of the ingredients are all relatively cheap, too, and this is a very simple cake to make, so it's a good one to keep in your back pocket for the next time you need an easy dessert.  As a bonus, it's vegan if you use vegetable shortening and skip the cream cheese frosting!  I hope you enjoy this cake as much as we did!

War Cake (recipe from Shirley)

  • 2 c. sugar
  • 2 c. water (if you're not trying to be so budget-friendly, sub 1/2 c. of the water with some spiced rum--yum!)
  • 1 lb raisins
  • 1/2 c. shortening
  • 3 c. flour
  • 2 tsp. baking soda
  • 1 tsp. cinnamon
  • 1 tsp. cloves
  • 1 tsp. salt

Combine the sugar, water, raisins, and shortening in a saucepan over medium-high heat.  Bring to a boil, and boil for 3-5 minutes.  Remove from heat, and let the mixture cool a bit.

Meanwhile, whisk together the flour, baking soda, cinnamon, cloves, and salt in a big bowl.  Add the cooled raisin mixture to the flour mixture, and stir until just combined.  Pour into a greased 9x13" cake pan.  Bake at 350*F for 40-50 minutes, or until a toothpick inserted into the center comes out clean.  Due to all the sugar in this cake, the cake will get VERY dark--don't let the color throw you!  It's not burning, I promise!  It's supposed to look like that.  Dust the cake with powdered sugar, OR frost with cream cheese frosting (recipe below).

Cream Cheese Frosting (adapted from my mom's recipe)

  • 8 oz. cream cheese, softened (full-fat, please!)
  • 1/2 c. butter, softened
  • 1 tsp. vanilla
  • 2 c. powdered sugar

Cream together the cream cheese and butter until light and fluffy.  Beat in the vanilla.  Whip in the powdered sugar until no lumps remain and frosting is fluffy.  Spread on cake, and fight over who gets to lick the bowl.  ;)

Monday, March 18, 2013

Irish Car Bomb Cheesecake Brownies

My company has been going through some layoffs and instituting some new cost-cutting measures recently.  Part of it is that our monthly meeting is no longer catered.  Bummer!  But, I'm looking at the silver lining--I've been making goodies to bring to the meeting each month!  My thought is that it's my insurance against getting laid off--if my name comes up, there will be outcry at the thought of no longer having sweet treats at our meetings!  :)


In honor of St. Patrick's Day, I wanted to make some boozy Irish Car Bomb cheesecake-swirled brownies!  I took a Guinness brownie recipe and added my own Bailey's cheesecake swirl--yum!  The Fiancé declared them the best brownies that he has ever had, and that's saying something!  They're REALLY fudge-y (bordering more on flourless chocolate cake than brownie), not super sweet (the Guinness adds a nice bitterness, and the salt balances out the sugar), and overall quite delicious!  So, if you're still celebrating St. Patrick's Day (I'm Irish, so I reserve the right to celebrate all week!), go ahead and make a pan of these brownies to cap off your dinner!


Irish Car Bomb Cheesecake Brownies (brownie base adapted from Bon Appetit, cheesecake swirl is a Blondie original)

  • 1 bottle Guinness (or another stout)
  • 12 oz semisweet chocolate chips
  • 1 c. butter
  • 1 3/4 c. sugar, divided
  • 5 eggs, divided
  • 2 tsp. vanilla extract
  • 1 3/4 tsp. salt
  • 1 c. flour
  • 8 oz cream cheese
  • 2 Tbl. Bailey's (or other Irish Cream)

Boil the Guinness uncovered over medium heat until it is reduced to about 1/3-1/2 c., stirring occasionally.  This might take a while!  Remove from heat and let cool partially.

Melt the chocolate chips and butter in the microwave (try 30-second increments, stirring after each one).  Once smooth, beat in 1 1/2 c. sugar.  One at a time, beat in 4 of the eggs.  Mix in the vanilla extract and the salt--yes, it seems like a lot of salt, but it's the perfect amount, trust me!  Finally, mix in the flour until just combined.  Pour the mixture into a greased 9x13" pan.

Meanwhile, cream the cream cheese with remaining 1/4 c. sugar.  Beat in the remaining egg.  Mix in the Bailey's until thoroughly combined.  Dollop spoonfuls of the cheesecake batter over the top of the brownie batter--there's no science to this, and it does not have to be precise!  Run a butter knife through the mixture to swirl the two batters together--careful not to overdo it, or you will lose the marbled effect!  Bake for about 40-50 minutes at 350* F, or until a toothpick inserted near the center comes out clean (or mostly clean, if you like your brownies slightly underbaked).

Friday, March 1, 2013

What's Baking February Round-Up

As I mentioned in my last post, I was lucky enough to host What's Baking this month!  Everyone did a great job making their own convenience products from scratch!  I was really impressed with the variety of entries!  Take a moment to click through and check out everyone's hard work!

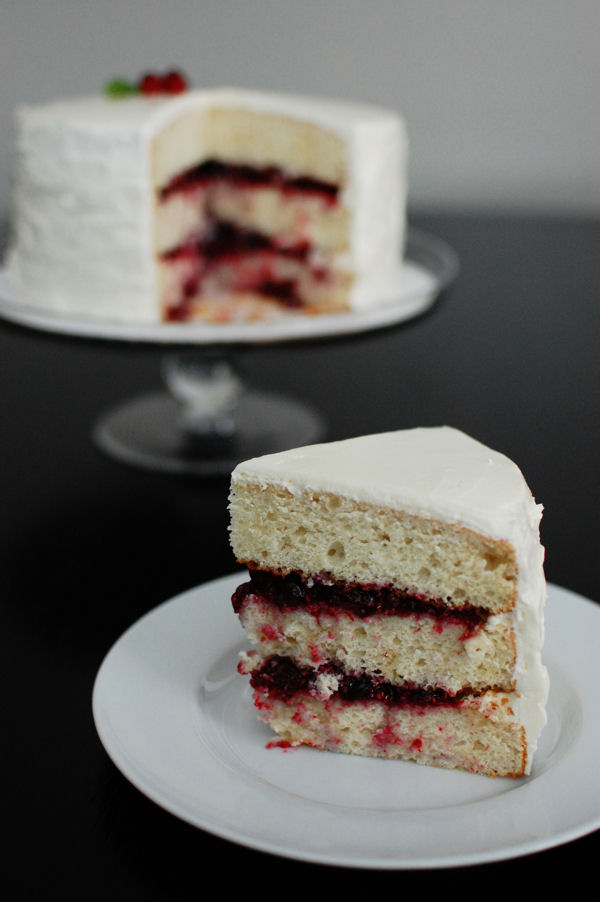
Jen from Beantown Baker made her own cran-raspberry preserves to fill a delicious-looking layer cake with white chocolate frosting.  I'll take a slice of that, please!


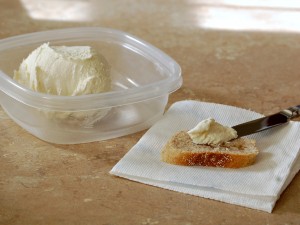
Coleen of the Redhead Baker tackled homemade mascarpone cheese!  What a great item to make from scratch, since it's so expensive in the store!  She suggests using it in tiramisu, cheesecake, or to fill profiteroles or cannoli!


Amanda from Our Italian Kitchen showed us how to get the best of both worlds by making your own cake mix from scratch!  Imagine that, the convenience of boxed cake mix, but without all the unpronounceable ingredients!  She used the mix to replicate her wedding cake for her anniversary.


Catherine from Pursuing Domestic Goddess-ness decided to take a more savory route and decided to try to replicate a certain famous store's Swedish Meatballs!  She put her own twist on them by tossing them in a chipotle apple sauce instead of the more common cream sauce.  Yummy!


Carrie of Carrie's Sweet Life tackled one of my personal favorite convenience products--pie crust!  She used it to make ham and cheddar quiches (sounds like a great breakfast to me!), but the recipe is versatile and would work in any pie recipe, too!


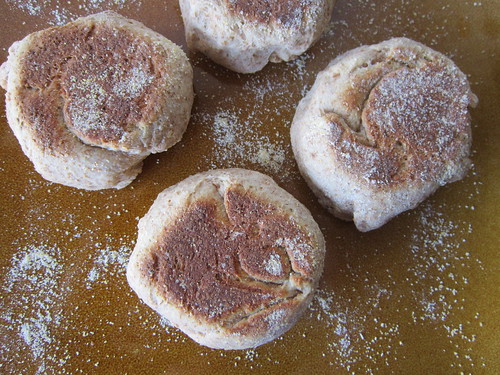
Jaida of Sweet Beginnings isn't usually a breakfast person but says her homemade English muffins just might change that!  Who knew that cooking them on a griddle pan is the secret to making this convenience product at home?


Eva from Eva Bakes had 2 pounds of local Virginia peanuts (hi, neighbor!) that she needed to use up, so she decided to make her own homemade peanut butter!  While she's not a peanut butter fan, her husband loved it and really enjoyed getting to adjust it to be as sweet or as salty as he wanted!


Lastly, I made some fresh ricotta that I then used in a ricotta cheesecake--delicious!


Next month's host is Jen from Beantown Baker, and her theme is Sprinkles!  Be sure to check out her blog at the end of March to see what these creative ladies come up with!

Thursday, February 28, 2013

What's Baking: Fresh Ricotta Cheesecake

I was the host of What's Baking? this month, and in the past, a few people have mentioned that they wished the themes were a little more challenging, so I wanted to step it up a bit!  I challenged everyone to either bake a convenience product or to make a convenience product and then bake something with it!


I tossed around a lot of different ideas--homemade graham crackers, homemade pie crust (yes, I usually buy it!), homemade lemon curd, and many others!  But I finally decided on homemade fresh ricotta cheese.  I was pleased with the result--it was a bit lemony, and the curds were bigger than I'm used to for ricotta, but it was quite tasty!  The yield was not great, unfortunately, but I got enough for my purposes!  It's not something I'll do every day, for sure, but it wasn't difficult at all.

I used my ricotta to make a fresh ricotta cheesecake.  It turned out really yummy!  It reminded me a lot of an Italian pastry that my dad used to make every year for Easter, called pastia (I have no idea on the spelling!).  The pastia is made with farmer's cheese or basket cheese, rather than ricotta, and has rice in it, but the texture and the cinnamon/orange flavors were very similar to this cheesecake!  It's one of my favorite Italian desserts, so that was a good thing!


Fresh Ricotta (from Serious Eats)

6 c. milk (I used skim, but whole would be tastier!)
6 Tbl. lemon juice or white vinegar (vinegar will give a more neutral flavor)
3/4 tsp. salt

Stir all the ingredients together in a large, clear, microwave-safe container.  Microwave on high for 6-10 minutes, stirring gently a couple times throughout, until the mixture starts to bubble around the edges and/or reaches 165* F.  Stir for 5 seconds, until the curds separate out from the whey.  Spoon the curds into a colander that has been lines with cheesecloth or paper towels.  Let drain while you make the crust for the cheesecake (or until it reaches a consistency that you like).

Ricotta Cheesecake with Shortbread Crust (crust from Joy of Baking, cheesecake adapted from Allrecipes.com)

1/3 c. plus 1 1/2 Tbl. all-purpose flour, divided
4 Tbl. powdered sugar, divided
3 Tbl. cold butter
1 c. (about 10 oz.) fresh or store-bought ricotta
2 eggs
2 Tbl. honey (use something good like orange flower or wildflower honey)
Zest of half an orange
Dash cinnamon
Dash salt
1/4-1/2 tsp. vanilla extract

For the crust, cut the butter into 1/3 c. flour and 2 Tbl. of the powdered sugar until pea-sized (you can also do this in a food processor).  Press the mixture into the bottom and up the sides of a 5" spring-form pan or other pan with high sides.  Bake at 400*F for 10 minutes, or until edges start to lightly brown.

Meanwhile, stir together the ricotta and eggs.  If you prefer a smoother texture, use a blender or food processor to mix them.  Stir in remaining 1 1/2 Tbl. flour, remaining 2 Tbl. powdered sugar, honey, zest, cinnamon, salt, and vanilla extract until combined.  Pour the mixture into the pan with the crust, and bake at 325* F for 30-40 minutes, or until the center is just firm.  Enjoy!

Monday, January 28, 2013

What's Baking: Healthier Raspberry Crisp

Catherine from Pursuing Domestic Godess-ness, our hostess for What's Baking? this month, chose the theme of baking healthier.  How timely!  By this time of the month, the novelty of New Year's resolutions is starting to wear off, so this is a great way to indulge yourself but still stay on track!  Plus, you can get some great ideas for a lighter Valentine's Day dessert, as that's coming up soon--romantic dinners need not leave you in a food coma!  Better to have something a little lighter to leave you feeling better for after-dinner cuddling and smooching!  ;)


Fruit crisps are one of my favorite desserts, especially when I'm trying to make something a little healthier.  First off, they are insanely simple to whip up, especially if you use frozen berries, like I do here.  Also, fruit is healthy!  And if you use a nice sweet fruit, you don't need to use much in the way of sugar, although I add some honey here, since raspberries are pretty tart.  I always add oats to the crisp topping, so you get some protein and fiber from the whole grain.  In this recipe, since I cut down the amount of butter in the crisp topping, it won't end up being quite as crunchy, but you add some nuts instead to make up for it--these add more protein, too!  All in all, this is a pretty healthy dessert...so you don't have to feel guilty about putting a scoop of ice cream on top.  Or eating it for breakfast.  Or both.  ;)


Raspberry Crisp (a Blondie original)

  • 4 c. raspberries (or any other fruit)
  • 1 Tbl. lemon juice
  • 1 Tbl. flour (only if your fruit is frozen or SUPER juicy!)
  • 1 tsp. vanilla extract
  • 3 Tbl. honey (use less if you're using a sweeter fruit, like blueberries)
  • 1/2 c. whole wheat flour
  • 1/2 c. all-purpose flour
  • 1/2 c. oats
  • 1/3 c. raw sugar
  • 1 tsp. cinnamon
  • 1/4 c. cold butter, diced
  • 1/2 c. chopped pecans (almonds or walnuts would also work)

Toss the first 5 ingredients (fruit through honey) together until everything is well-distributed.  Pour the mixture into a greased 9x9" baking dish.

In a food processor, pulse the remaining ingredients (flours through butter) until the butter is in pea-sized pieces and is well distributed.  Mix the nuts into the topping mixture.  Sprinkle the topping over the fruit, distributing it evenly.  Bake at 375* F for 35-50 minutes (the longer time is if your fruit is frozen), or until the top is lightly brown, and the filling is hot and bubbling.

Monday, January 7, 2013

Compost Cookies

The ladies at my workplace always do a cookie and craft exchange every year around the holidays.  I always do my best for the craft part, but I'll be honest--it's not really my strong suit.  Last year, I attempted to crochet a rug out of t-shirt scraps...and it turned out shaped more like a table runner--too narrow to be a rug!  But, being the procrastinator that I am, I had waited until the last possible second to make it, so I had no time to re-do it.  This year, I got the brilliant idea to crochet a set of placemats from raffia, since many of the ladies wanted something that was more practical.  Again, I waited until the last minute, only to find out that raffia is a real pain to work with, and at about 8:45 pm on the night before the exchange, I realized that I had no hope of finishing the placemats in time (in fact, I only had about 2 rows of the first one done after working on it for 2 hours!).  After frantically checking my local craft store's hours, I gunned it to get there before they closed at 9 pm, picked up some chunky yarn, went home, got my biggest crochet hook, and cranked out a simple scarf in no time flat.  Thankfully, the recipient loved it.  Phew!


The cookie part of the exchange comes much more naturally to me!  I have a reputation for being a good cook and baker around the office, though, so I always do my best to bring my A game and to make sure I bake something slightly out of the norm.  This year, I included the molasses ginger cookies that I blogged previously (the darker cookie in the picture) along with these not-so-little gems.  These cookies are an addictive combination of salty and sweet, which is always a good thing!  And they're HUGE!  They're also very flexible--they're called compost cookies because you can use whatever mix-ins you have lying around the house!  You can use this recipe to finish up all those half-empty bags of baking ingredients and snack foods that clutter up your pantry (unless that's just me?).  I've included some ideas for mix-ins below, but the only limit is your imagination!  You'll want the mix-ins to be small enough that you can get a few per cookie, but big enough to get a contrast in texture between the different ones!  Do yourself a favor, though, and make these cookies!

Salty: potato chips, pretzels, salted roasted nuts, crackers, popcorn, cooked and crumbled bacon
Sweet: semi-sweet, milk, dark, or white chocolate chips, butterscotch chips, peanut butter chips, graham crackers, cereal, toffee bits, cookies, candy, coconut
Neutral: oatmeal, unsalted nuts

Compost Cookies (adapted from Christina Tosi, as seen on The Amateur Gourmet)

  • 1 c. butter
  • 1 c. white sugar
  • 3/4 c. brown sugar
  • 1 egg plus 1 yolk
  • 1 Tbl. corn syrup
  • 1 tsp. vanilla extract
  • 1 3/4 c. all purpose flour
  • 2 tsp. baking powder
  • 1 tsp. baking soda
  • 2 tsp. salt (yes, this seems like a lot, but it's right!)
  • 2 c. salty mix-ins (I used potato chips and pretzels)
  • 2 c. sweet mix-ins (I used mini semi-sweet chocolate chips, milk chocolate chips, white chocolate chips, and crushed graham crackers)

Thoroughly cream together the butter and sugars until light and fluffy.  Beat in the egg and yolk, corn syrup, and vanilla until thoroughly combined.  Sift together the flour, baking powder, baking soda, and salt, and then stir the sifted ingredients into the wet ingredients until mostly mixed.  Very gently, fold in the mix-ins.

Using a 4-oz (1/4 c.) ice cream scoop, scoop the dough out onto baking sheets lined with parchment paper.  Refrigerate at least 4 hours, preferably overnight, or freeze.  To bake, make sure the dough balls are spaced at least 4 in. away from each other on parchment paper-lined baking sheets--these cookies spread!   Bake at 350* F for 15-18 minutes, or until edges are set.  Let cool on the baking sheet, and then taste test your new favorite cookie!

*Note: if you're not using mix-ins that will absorb a fair amount of moisture (oatmeal, graham cracker crumbs, pretzel crumbs), you may need to add an additional 1/4 c. of flour to the dough.

Tuesday, January 1, 2013

Molasses Ginger Cookies

So, I mentioned a few posts ago that the Boyfriend had graduated to Fiancé status!  Just in time for our two year anniversary, I'm finally getting around to telling the whole story...and what a story it is!  Several months ago, Fiancé mentioned that a coworker of his had reservations at the Palladio, one of the nicest restaurants in town at one of our favorite wineries--I was pretty jealous!  It has always been on my bucket list to go there.  Fast forward a few months...we had been planning on having a weekend to ourselves, and Fiancé had promised to take me out to a nice dinner as a belated birthday celebration that weekend.  Well, a few days before our weekend, I came down with a terrible case of tonsillitis!  And that's when Fiancé told me that his coworker couldn't use his reservations at the Palladio and had offered them to us, so we had a reservation for the next day for my birthday dinner!  I promptly cleaned out every sore throat remedy at the drug store and spent the whole rest of the day hemming and hawing over whether I felt up to going out.  I finally decided that I thought I could swallow a few bites, so we headed out.

When we got there, they couldn't find our reservation (part of the plan, apparently) and had us sit and wait for a few minutes before they said they had figured out a place to put us.  We were informed that they had found a table, and we started to head back when the hostess asked Fiancé if he had a jacket, since jackets are required for the men, but he wasn't wearing one (again, part of the plan)!  He said "um....yeah, but it's at my house and would take me an hour to go get!"  He then asked if they had anything he could use, and the hostess said she would check.  She brought out a jacket for him, and I made a joke about it fitting him better than his (30 year old, second-hand) jacket.  They seated us at a table with place settings for 3 and assured us that they would get the extra place setting cleared right away.  Fiancé and I chatted a bit, and then he said, "There's something in the pocket of this jacket!"  I figured someone had forgotten a cigar case or something in there, but he pulled out a small box and got down on one knee!


But it gets better! After I had said yes, he said that we needed to call my best friend (who lives in New York) to tell her.  So, we did.  Except, I was hearing an echo or hearing her voice twice.  Then, she stepped out from around the corner!!!  She had driven down to surprise me and be part of it!  Apparently Fiancé had bought the jacket in secret and had my best friend deliver it (containing the ring box) to the restaurant when she arrived, shortly before we arrived.  She had also been taking pictures during the proposal--I was peripherally aware that someone was taking pictures but was so excited and so focued on the Fiancé that I didn't even see that it was her!


It was an amazing evening that got off to an amazing start!  And the food was just as spectacular!  We sampled rabbit, lobster croquettes, goat cheese croquettes, beef tongue, white bolognese, butternut squash ravioli, gorgonzola gnocchi, savory pumpkin bread pudding, flank steak, pork cheeks, and more during the amuse-bouche, appetizer, pasta, and entree courses.  For dessert, we enjoyed our orders of cranberry cake with cinnamon ice cream, tiramisu, and peppermint mocha lava cake.  And to make the evening even more special, the waitstaff brought over a plate of chocolate-dipped fruit with mini chocolate chip cookies and molasses cookies with "Congratulations" written in chocolate on the plate.  It's the little touches that really make it special.  And given that molasses cookies are favorites of both of ours, we really appreciated it!


And, so you guys can share in this excitement with me, I would like to share an awesome molasses cookie recipe!  I made these ones full-sized, rather than mini bite-sized ones, but feel free to make them whatever size your heart desires.  Just adjust the baking time!  ;)  My roommate's boyfriend declared these cookies to be the pinnacle of perfection, so don't be skeptical of the black pepper!  The molasses cookie is in front, and the cookies behind it are Compost Cookies (to be published next week!).


Molasses Ginger Cookies (adapted from Bon Appetit)

  • 1 c. unsalted butter, softened
  • 3/4 c. packed brown sugar
  • 1/2 c. blackstrap molasses
  • 1 egg
  • 1 tsp. vanilla extract
  • 2 1/4 c. all purpose flour.
  • 1 1/2 tsp. ground ginger
  • 1 1/2 tsp. baking soda
  • 1 tsp. cinnamon
  • 1/2 tsp. nutmeg
  • 1/2 tsp. salt
  • 1/4 tsp. black pepper
  • 1/2 c. minced crystallized ginger
  • Raw sugar
Cream together the butter and sugar.  Beat in molasses, egg, and vanilla extract until smooth.  Sift together the flour, baking soda, salt, and spices.  Stir the dry ingredients into the wet ones until mostly combined.  Add in the crystallized ginger and stir until combined.

Scoop dough out by tablespoonful, and form into a ball.  Roll the ball in raw sugar, and place on a baking sheet covered with parchment paper.  Bake at 350* F for 10-12 minutes or until edges are set and cookie appears crackled.  Share with those you love.

Monday, December 24, 2012

What's Baking?: Chocolate Peppermint Cookies


This month's What's Baking? challenge was to bake something using peppermint.  How wonderfully seasonal!  I had recently seen a Paula Deen show where she was making cookies and dipped them in white chocolate and then into crushed candy canes, but it was with butterscotch cookies or something of the sort, which didn't seem to me to go at all!  I did think it sounded like a great idea to do on chocolate cookies, however, so when this challenge rolled around, I knew what my plan was!


Chocolate Peppermint Cookies (adapted from Martha Stewart)

  • 1/2 c. unsalted butter
  • 8 oz semisweet chocolate chips (roughly 1 c.), divided
  • 1 1/2 c. sugar
  • 2 eggs
  • 1 tsp. vanilla extract
  • 1 c. all purpose flour
  • 1/2 c. cocoa powder
  • 1/2 tsp. baking soda
  • 1/2 tsp. salt
  • White chocolate or vanilla coating
  • 1 box of candy canes, unwrapped and finely crushed

Melt the butter and 4 oz. of the chocolate chips in the microwave.  Beat in sugar, eggs, and vanilla extract.  Sift together the flour, cocoa powder, baking soda, and salt, and stir into the chocolate mixture until mostly combined.  Stir in the remaining chocolate chips.  Chill batter overnight.

Scoop the batter out by tablespoonful (or 1 1/2-in cookie scoop) onto a cookie sheet lined with parchment paper.  Bake at 325* F for 15 minutes, or until edges are set.  Let cool completely.

Melt the white chocolate coating in the microwave.  Dip each cookie partially in the white chocolate coating, and shake excess white chocolate off.  Immediately dip coated part of cookie in crushed candy cane.  Let set, and then enjoy!

Tuesday, November 27, 2012

What's Baking?: White Chocolate Coconut Cranberry Pie

Yay for What's Baking? posts!  This month's theme was pie, hosted by Kim of Just Baked.  I actually had trouble coming up with an idea for this theme!  I've done a fair number of pies already, since it's probably my favorite kind of dessert!  The Fiancé (more on that in another post!!!) and I had been talking about his mom's coconut cream pie recently, and I realized that although I've blogged a few different cream pies, that one was not one of them!  I wanted to make it a little bit more seasonal, though, because coconut seems very summery to me, so I decided to add cranberries.  And since cranberry white chocolate cookies are so good, I decided to add white chocolate.  And that, dear readers, was how the white chocolate coconut cranberry pie was born.


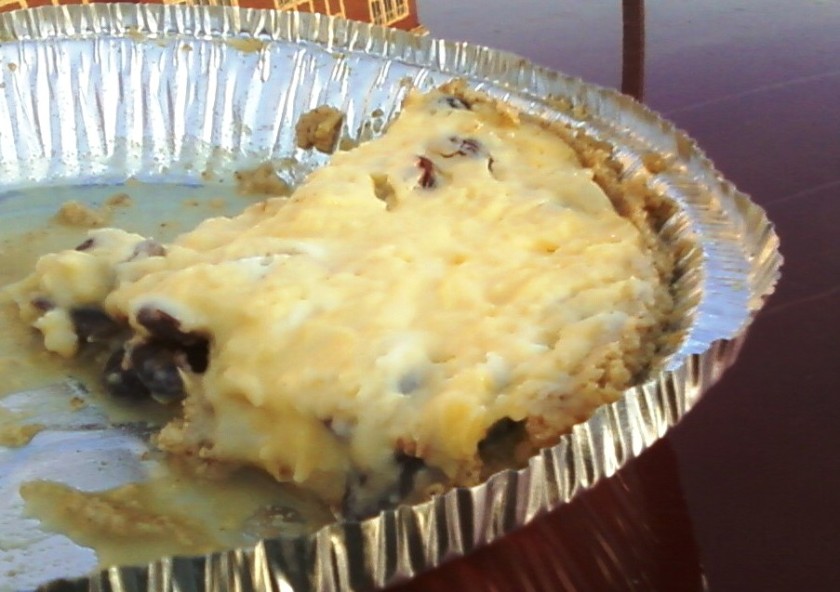
Now, please forgive the picture.  I think the fat content of the white chocolate threw off the chemistry of the pie a bit, because it didn't set up quite as well as usual, and it separated a bit after sitting a few days.  So, in the recipe below, I adjusted the cornstarch amount to account for that.


You'll also notice that there is no added sugar in this pie.  It's not a typo, I swear!  It is plenty sweet with the white chocolate and sweetened coconut!  If you use unsweetened coconut and have a real sweet tooth, you may want to add maybe 1/4 c. sugar.  If you're like me, and prefer desserts that are slightly less sweet, use unsweetened coconut without any added sugar.

I hope you enjoy this as much as we did!  If you use a store-bought graham cracker crust, you'll have a bit of filling left over--just pour it in a bowl, and enjoy like pudding!  ;)  I think homemade ones are a bit bigger, so it should fill those ones fine.  Pecans would also make a lovely addition to this pie, either in the filling, as a garnish, or as part of the crust!

White Chocolate Coconut Cranberry Pie (adapted from Andrew's mom's coconut cream pie recipe)

  • 1 9" graham cracker crust
  • 3 c. milk
  • 6 Tbl. cornstarch
  • 3 egg yolks
  • 2 tsp. vanilla
  • 4 oz (roughly 1/2 c.) white chocolate chips
  • 1-2 Tbl butter
  • 1 to 1 1/2 c. dried shredded coconut, sweetened or unsweetened
  • 1/2 to 1 c. dried cranberries

Heat the milk in a medium saucepan until it just comes to a boil.  Meanwhile, whisk together the cornstarch, egg yolks, and vanilla.  When the milk has been scalded, temper the eggs by slowly adding about 1 c. of the milk to the egg mixture, whisking the eggs constantly.  Once they have been tempered, add the egg mixture to the saucepan of milk, and whisk to combine.  Continue to cook the mixture, stirring frequently, until it thickens considerably.  When it does, remove it from the heat and add the white chocolate chips and butter.  Let the mixture stand for about 5 minutes, whisking occasionally, until the white chocolate has melted.  Stir in the coconut and cranberries, and pour the mixture into the graham cracker crust.  Press plastic wrap directly onto the surface of the pie to cover it and prevent a skin from forming.  Let the pie chill for 6 hours or overnight, and then dig in!

Monday, October 29, 2012

Bacon Cayenne Snickerdoodles

So, Boyfriend wanted his teenage son to learn how to cook this past summer.  His son was surprisingly amenable to and good-natured about the idea.  Boyfriend taught him to grill and smoke meat, and I taught him how to saute, sear, wilt, sweat, stir-fry, pan-fry, cook, and bake pretty much everything else.  At the end of the summer, he made snickerdoodles all by himself.  And they turned out really well!  Boyfriend's son was so excited because he loves snickerdoodles.  LOVES snickerdoodles.  Who can blame him, really?  Chewy yummy salty-sweet cookies with that delicious cinnamon sugar coating?  Yes, please!  Anyways, I was trying to talk to him about how, once you've got the hang of a recipe, you can play with it.  Off the top of my head, I spouted off the idea of bacon snickerdoodles.  You should have seen his eyes lit up!  Oh my, was he ever interested in that idea!  So, I decided to make some to ship to him for his birthday.


I had a general idea about how I wanted to make these, but there were surprisingly few bacon snickerdoodle recipes out there!  I figured someone would have figured it out already!  This recipe caught my eye, but it wasn't quite what I was looking for.  It was good inspiration to add the cayenne, though!  So, I went for a standard snickerdoodle recipe and adapted it.  These were quite the success!  Just a little hint of heat and the right amount of bacon make these the perfect combination of sweet, salty, and spicy!  Boyfriend commented that the cayenne creeps up on you just enough so that you notice it after the fourth cookie or so and decide to stop eating.  Can't say I ever ate four of them, but I'll take his word for it.  It obviously didn't slow Boyfriend down too much, though, given that he ATE THEM ALL before I could ship some to his son.  But that's ok.  Once I post this recipe, his son can make them himself.  Because he learned how to cook.  And now, he can impress all the ladies with these easy gourmet treats.

Bacon Cayenne Snickerdoodles (inspired by Food Beast, adapted from Allrecipes)

  • 1/2 c. bacon grease (I save mine every time I cook bacon and keep it in the refrigerator.  I highly encourage you to do this.  Makes it SO much easier to add a bit of bacon-y goodness to anything and everything!  Sub shortening if you don't have enough.)
  • 1/2 c. butter
  • 1 c. brown sugar
  • 1/2 c. plus 2 Tbl. white sugar, divided
  • 2 eggs
  • 2 3/4 c. flour
  • 2 tsp. cream of tartar
  • 1 tsp. baking soda
  • 1/2-3/4 tsp. salt (use 1/2 tsp. if using crumbed bacon)
  • 1/2-3/4 tsp. cayenne (use less if you don't like spicy food, more if you do!)
  • 1/2 c. cooked, crumbled bacon (optional ONLY if you're using the full amount of bacon grease)
  • 2 tsp. cinnamon

Cream together bacon grease, butter, brown sugar, and 1/2 c. white sugar.  If you don't have any (or nearly enough) bacon grease, you can make up the difference with shortening.  Once the fats and sugars have been creamed together, beat in eggs, one at a time.  Sift together the dry ingredients, and stir them into the butter mixture.  If you had the full amount of bacon grease, feel free to leave out the crumbled bacon.  If you leave out the crumbled bacon, use 3/4 tsp. salt.  Use 1/2 tsp. salt if you are using bacon.  Stir in the bacon, if using.  Form the dough into 1- to 1 1/2-in balls.  Mix together remaining 2 Tbl. sugar and the cinnamon.  Roll the dough balls in the cinnamon sugar mixture until coated.

Place dough balls on a cookie sheet, roughly two inches apart.  Bake 8-10 minutes at 400* F, or until edges are just set.  Remove from oven, let cool for 10 minutes, and then remove from baking sheet.  Devour.

Wednesday, October 24, 2012

Veggie-ful Spice Cupcakes

I can tell that the weather is getting colder by what's showing up in my CSA box.  We've gotten a lot of squash and root vegetables lately.  This has meant getting pretty creative, since Boyfriend HATES squash.  And I mean HATES squash.  I've successfully hidden it in chili and mac and cheese so far.  The risotto was not successful.  We've also been getting beets.  And I HATE beets.  I had two bunches of beets, again from the CSA box, sitting in my fridge, staring at me.  The only thing that I have made in the past where I could tolerate beets were cupcakes.  So, I decided to run with that again.  When I made them last time, it was basically like a spice cake or carrot cake, but with beets instead of carrots.  So, since my mom makes the best carrot cake EVER, I decided to adapt her recipe, and just sub beets for carrots.  But, I was making them for my dance instructor's birthday, and he's constantly complaining that he's on a diet.  So, I decided that I needed to lighten up the recipe a bit.  My mom usually substitutes applesauce for some of the oil in her recipe, but I didn't have any applesauce lying around.  I pondered a bit more and remembered that I've heard of people using baby food or other fruit/vegetable purees instead of oil, too.  And then the seed of an idea formed.  I could roast and puree that acorn squash that I'd been trying to figure out how to surreptitiously feed to Boyfriend and use THAT instead of some of the oil!  I'd hide not one, but TWO hated vegetables in these cupcakes!
I made sure to make them when he wasn't around and not to tell him what the secret ingredients were until AFTER they were all gone.

Mission accomplished.  We both liked the cupcakes, AND I got rid of two bunches of beets and an acorn squash.  So, next time you're dreading a vegetable, try to figure out how to turn it into a dessert.  Butter and sugar make everything taste better, right?


P.S., Mom, I'm sorry for bastardizing your cupcakes.  But not really.  Because they were tasty.

Veggie-ful Spice Cupcakes (adapted from my mom's carrot cake recipe)

  • 1 c. applesauce or pumpkin, sweet potato, or acorn or butternut squash puree
  • 1/3 c. canola oil
  • 2 c. sugar
  • 4 eggs
  • 1/4 c. spiced rum (optional)
  • 2 c. flour
  • 2 tsp. baking soda
  • 1 Tbl. cinnamon
  • 3 c. shredded beets or carrots

Combine the oil, sugar, and puree, and mix until thoroughly combined.  Beat in the eggs, two at a time.  Mix in the spiced rum, if desired.  Sift together the dry ingredients, add them to the wet ingredients, and stir until mostly combined.  Stir in the shredded beets or carrots until everything is mixed.

Evenly divide the batter into greased muffin tins (an ice cream scoop works well for this!), and bake for 20-25 minutes at 350* F.  You'll get ~two dozen cupcakes out of this recipe.  Alternatively, pour into a 9x13-in cake pan and bake for 40-50 minutes for a single-layer, rectangular cake, or divide between two 8- or 9-in round cake pans and bake for 30-40 minutes for a two-layer round cake.

Top with your favorite cream cheese frosting, caramel frosting, brown butter frosting, or whatever floats your boat.  Just don't do Greek yogurt frosting in an effort to get the tangy effect of cream cheese without running to the store to buy it.  It will never set up.  Ever.