Showing posts with label white chocolate. Show all posts

Monday, January 7, 2013

Compost Cookies

The ladies at my workplace always do a cookie and craft exchange every year around the holidays.  I always do my best for the craft part, but I'll be honest--it's not really my strong suit.  Last year, I attempted to crochet a rug out of t-shirt scraps...and it turned out shaped more like a table runner--too narrow to be a rug!  But, being the procrastinator that I am, I had waited until the last possible second to make it, so I had no time to re-do it.  This year, I got the brilliant idea to crochet a set of placemats from raffia, since many of the ladies wanted something that was more practical.  Again, I waited until the last minute, only to find out that raffia is a real pain to work with, and at about 8:45 pm on the night before the exchange, I realized that I had no hope of finishing the placemats in time (in fact, I only had about 2 rows of the first one done after working on it for 2 hours!).  After frantically checking my local craft store's hours, I gunned it to get there before they closed at 9 pm, picked up some chunky yarn, went home, got my biggest crochet hook, and cranked out a simple scarf in no time flat.  Thankfully, the recipient loved it.  Phew!


The cookie part of the exchange comes much more naturally to me!  I have a reputation for being a good cook and baker around the office, though, so I always do my best to bring my A game and to make sure I bake something slightly out of the norm.  This year, I included the molasses ginger cookies that I blogged previously (the darker cookie in the picture) along with these not-so-little gems.  These cookies are an addictive combination of salty and sweet, which is always a good thing!  And they're HUGE!  They're also very flexible--they're called compost cookies because you can use whatever mix-ins you have lying around the house!  You can use this recipe to finish up all those half-empty bags of baking ingredients and snack foods that clutter up your pantry (unless that's just me?).  I've included some ideas for mix-ins below, but the only limit is your imagination!  You'll want the mix-ins to be small enough that you can get a few per cookie, but big enough to get a contrast in texture between the different ones!  Do yourself a favor, though, and make these cookies!

Salty: potato chips, pretzels, salted roasted nuts, crackers, popcorn, cooked and crumbled bacon
Sweet: semi-sweet, milk, dark, or white chocolate chips, butterscotch chips, peanut butter chips, graham crackers, cereal, toffee bits, cookies, candy, coconut
Neutral: oatmeal, unsalted nuts

Compost Cookies (adapted from Christina Tosi, as seen on The Amateur Gourmet)

  • 1 c. butter
  • 1 c. white sugar
  • 3/4 c. brown sugar
  • 1 egg plus 1 yolk
  • 1 Tbl. corn syrup
  • 1 tsp. vanilla extract
  • 1 3/4 c. all purpose flour
  • 2 tsp. baking powder
  • 1 tsp. baking soda
  • 2 tsp. salt (yes, this seems like a lot, but it's right!)
  • 2 c. salty mix-ins (I used potato chips and pretzels)
  • 2 c. sweet mix-ins (I used mini semi-sweet chocolate chips, milk chocolate chips, white chocolate chips, and crushed graham crackers)

Thoroughly cream together the butter and sugars until light and fluffy.  Beat in the egg and yolk, corn syrup, and vanilla until thoroughly combined.  Sift together the flour, baking powder, baking soda, and salt, and then stir the sifted ingredients into the wet ingredients until mostly mixed.  Very gently, fold in the mix-ins.

Using a 4-oz (1/4 c.) ice cream scoop, scoop the dough out onto baking sheets lined with parchment paper.  Refrigerate at least 4 hours, preferably overnight, or freeze.  To bake, make sure the dough balls are spaced at least 4 in. away from each other on parchment paper-lined baking sheets--these cookies spread!   Bake at 350* F for 15-18 minutes, or until edges are set.  Let cool on the baking sheet, and then taste test your new favorite cookie!

*Note: if you're not using mix-ins that will absorb a fair amount of moisture (oatmeal, graham cracker crumbs, pretzel crumbs), you may need to add an additional 1/4 c. of flour to the dough.

Monday, December 24, 2012

What's Baking?: Chocolate Peppermint Cookies


This month's What's Baking? challenge was to bake something using peppermint.  How wonderfully seasonal!  I had recently seen a Paula Deen show where she was making cookies and dipped them in white chocolate and then into crushed candy canes, but it was with butterscotch cookies or something of the sort, which didn't seem to me to go at all!  I did think it sounded like a great idea to do on chocolate cookies, however, so when this challenge rolled around, I knew what my plan was!


Chocolate Peppermint Cookies (adapted from Martha Stewart)

  • 1/2 c. unsalted butter
  • 8 oz semisweet chocolate chips (roughly 1 c.), divided
  • 1 1/2 c. sugar
  • 2 eggs
  • 1 tsp. vanilla extract
  • 1 c. all purpose flour
  • 1/2 c. cocoa powder
  • 1/2 tsp. baking soda
  • 1/2 tsp. salt
  • White chocolate or vanilla coating
  • 1 box of candy canes, unwrapped and finely crushed

Melt the butter and 4 oz. of the chocolate chips in the microwave.  Beat in sugar, eggs, and vanilla extract.  Sift together the flour, cocoa powder, baking soda, and salt, and stir into the chocolate mixture until mostly combined.  Stir in the remaining chocolate chips.  Chill batter overnight.

Scoop the batter out by tablespoonful (or 1 1/2-in cookie scoop) onto a cookie sheet lined with parchment paper.  Bake at 325* F for 15 minutes, or until edges are set.  Let cool completely.

Melt the white chocolate coating in the microwave.  Dip each cookie partially in the white chocolate coating, and shake excess white chocolate off.  Immediately dip coated part of cookie in crushed candy cane.  Let set, and then enjoy!

Tuesday, November 27, 2012

What's Baking?: White Chocolate Coconut Cranberry Pie

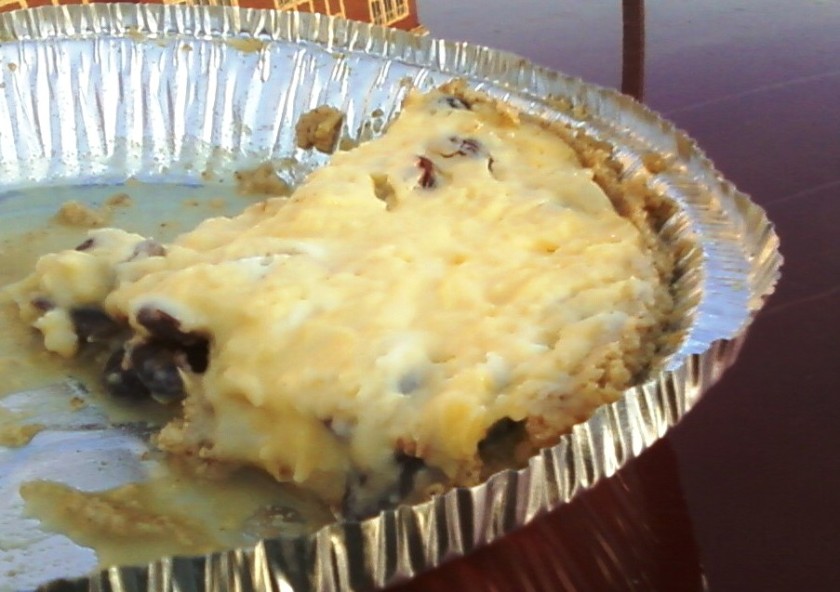
Yay for What's Baking? posts!  This month's theme was pie, hosted by Kim of Just Baked.  I actually had trouble coming up with an idea for this theme!  I've done a fair number of pies already, since it's probably my favorite kind of dessert!  The FiancĂ© (more on that in another post!!!) and I had been talking about his mom's coconut cream pie recently, and I realized that although I've blogged a few different cream pies, that one was not one of them!  I wanted to make it a little bit more seasonal, though, because coconut seems very summery to me, so I decided to add cranberries.  And since cranberry white chocolate cookies are so good, I decided to add white chocolate.  And that, dear readers, was how the white chocolate coconut cranberry pie was born.


Now, please forgive the picture.  I think the fat content of the white chocolate threw off the chemistry of the pie a bit, because it didn't set up quite as well as usual, and it separated a bit after sitting a few days.  So, in the recipe below, I adjusted the cornstarch amount to account for that.


You'll also notice that there is no added sugar in this pie.  It's not a typo, I swear!  It is plenty sweet with the white chocolate and sweetened coconut!  If you use unsweetened coconut and have a real sweet tooth, you may want to add maybe 1/4 c. sugar.  If you're like me, and prefer desserts that are slightly less sweet, use unsweetened coconut without any added sugar.

I hope you enjoy this as much as we did!  If you use a store-bought graham cracker crust, you'll have a bit of filling left over--just pour it in a bowl, and enjoy like pudding!  ;)  I think homemade ones are a bit bigger, so it should fill those ones fine.  Pecans would also make a lovely addition to this pie, either in the filling, as a garnish, or as part of the crust!

White Chocolate Coconut Cranberry Pie (adapted from Andrew's mom's coconut cream pie recipe)

  • 1 9" graham cracker crust
  • 3 c. milk
  • 6 Tbl. cornstarch
  • 3 egg yolks
  • 2 tsp. vanilla
  • 4 oz (roughly 1/2 c.) white chocolate chips
  • 1-2 Tbl butter
  • 1 to 1 1/2 c. dried shredded coconut, sweetened or unsweetened
  • 1/2 to 1 c. dried cranberries

Heat the milk in a medium saucepan until it just comes to a boil.  Meanwhile, whisk together the cornstarch, egg yolks, and vanilla.  When the milk has been scalded, temper the eggs by slowly adding about 1 c. of the milk to the egg mixture, whisking the eggs constantly.  Once they have been tempered, add the egg mixture to the saucepan of milk, and whisk to combine.  Continue to cook the mixture, stirring frequently, until it thickens considerably.  When it does, remove it from the heat and add the white chocolate chips and butter.  Let the mixture stand for about 5 minutes, whisking occasionally, until the white chocolate has melted.  Stir in the coconut and cranberries, and pour the mixture into the graham cracker crust.  Press plastic wrap directly onto the surface of the pie to cover it and prevent a skin from forming.  Let the pie chill for 6 hours or overnight, and then dig in!

Friday, January 27, 2012

What's Baking: Kitchen Sink Cookies

It's that time of month again--the one time that I actually update the blog. It's time for What's Baking? This month's theme was snow day treats. When I started thinking about the theme, I realized that if it's really snowy out, I'm not going to want to be driving to the grocery store to buy all sorts of ingredients to make something. So, when I thought of a snow day treat, I thought of something simple, something that I could make with ingredients that I already had on hand.


Now, if you're anything like me, you've always got partial bags of baking chips, nuts, etc. lying around the cupboards because a recipe called for 1 c. or 3/4 c., and you never got around to using up the rest. Well, today, I'm going to share with you a simple cookie recipe that I call kitchen sink cookies, because you can add in whatever mix-ins you want, except maybe the kitchen sink, and you can use up all those partial bags! In my case, the mix-ins were coconut, walnuts, hazelnuts, and white chocolate (about 3/4 c. coconut, 1 c. white chocolate, 1/2 c. walnuts, and 3/4 c. hazelnuts) chips, but feel free to use whatever you have on hand--baking chips, nuts, candies, or whatever else is lying around your cupboard!


Kitchen Sink Cookies (adapted from Allrecipes.com)

  • 2 c. all-purpose flour
  • 1/2 tsp. salt
  • 1/2 tsp. baking soda
  • 3/4 c. butter, melted
  • 1 c. white sugar
  • 1/2 c. packed brown sugar
  • 2 tsp. vanilla extract
  • 1 egg
  • 1 egg yolk
  • 3 c. mix-ins of your choice

Sift or whisk together the flour, salt, and baking soda. In a separate bowl, mix together the melted butter, white sugar, and brown sugar. Beat in egg, egg yolk, and vanilla into the butter/sugar mixture. Add the flour mixture to the wet ingredients, and stir until mostly combined. Add in the mix-ins, and mix until combined. Refrigerate for approximately 1 hr.

Drop cookies by rounded tablespoon onto a greased cookie sheet. Bake at 325* F for 12 minutes, or until the edges are set. Take the cookie sheet out of the oven, and let the cookies cool on the baking sheet for another 10 minutes before removing them. Makes ~2 dozen.

The boyfriend said that these were the best cookies that I had ever made after devouring about 4 of them in a row! So, I encourage you to try these out next time you're snowed in or just need an excuse to clean out the baking cupboard!

Wednesday, December 29, 2010

What's Baking: Peppermint Fudge

So, I got to be the host of "What's Baking?" this month--yay! For my theme, I chose holiday colors. Now, I only used one holiday color, and that's red, but I think the results are delicious enough that you won't mind the absence of green!


I have a friend who can't have gluten. As such, I couldn't give her the yummy cookie dough mix I gave everyone else, so I needed an alternative. Fudge seemed like the perfect thing! And peppermint fudge would be fun-looking and seasonal! Just be sure to find candy canes that are gluten-free (some are rolled in flour before packaging). Besides being delicious, this fudge is also really simple--no candy thermometer required!


Peppermint Fudge (slightly adapted from Allrecipes.com)

  • 2 (10-oz) bags of white chocolate chips
  • 1 14-oz. can sweetened condensed milk
  • Healthy splash (otherwise known as 1-2 Tbl.) Peppermint Schnapps
  • 1 1/2 c. crushed candy canes, divided
  • A couple drops of red food coloring

Line an 8x8 pan with foil, and grease it with baking spray.

Pour the white chocolate chips and sweetened condensed milk into a medium saucepan. Heat over medium-low heat, stirring constantly, until chips are nearly melted. Remove from heat and continue stirring until all chips are melted and the mixture is smooth. Mix in Peppermint Schnapps and 1 c. of cushed candy canes, stirring until well-combined. Add a couple drops of red food coloring to different areas of the pan, and stir once or twice, just to slightly swirl in the food coloring. Transfer mixture to the 8x8 pan, and top with remaining crushed candy canes. Refrigerate several hours, or until firm.

Friday, October 15, 2010

Pumpkin Blondies

We're continuing the pumpkin obsession here. I have pumpkin blondies for you today, and I have one other post ready to go on a different pumpkin dessert. Plus, there's still one more 29-oz can of pumpkin sitting in my pantry. Think I'll have any trouble using it before the season is over? Nah, me neither.

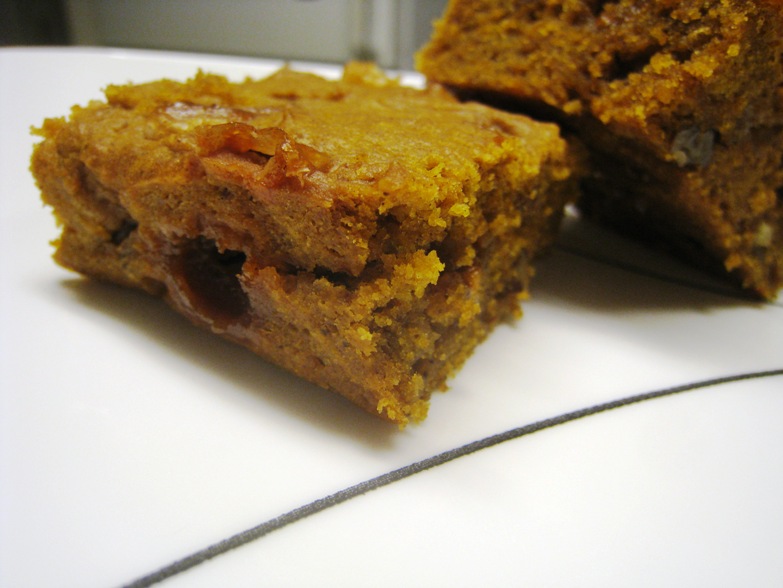
The blondies my mom always made were very much like a bar cookie--dense and chewy, not cake-like at all. I'm coming to learn that perhaps other people may understand other things as blondies...the first indication of this was when my white chocolate blondies turned out cakey. Then, someone asked on What's Cooking the other day for pumpkin blondies that weren't cakey...and didn't get many helpful replies. Hmmmm. So I looked at the picture in my source recipe, and I was suspicious. The looked like they could go either way. After looking at my mom's blondie recipe, I decided to make a couple edits to the pumpkin blondies recipe to try to make them denser and less cakey. I was partially successful. This is what comes from playing around with baking chemistry without fully understanding it. These were definitely dense enough, but still had more of a cakey texture, rather than a chewy texture. I guess I'll just have to keep baking test batches until I get it right. Darn.


Pumpkin Blondies (Adapted from Annie's Eats)

  • 2 c. all-purpose flour
  • 1 Tbl. pumpkin pie spice (or eyeball a mixture of cinnamon, cloves, ginger, and nutmeg)
  • 1/4 tsp. baking soda
  • 3/4 tsp. salt
  • 16 Tbl. unsalted butter, melted
  • 1/2 c. brown sugar
  • Heaping 1/2 c. white sugar
  • 1 egg
  • 2 tsp. vanilla extract
  • 1 c. pumpkin puree
  • 1 c. white chocolate chips
  • 1 c. butterscotch chips
  • 1/2 c. toasted chopped pecans

Sift together flour, spices, baking soda, and salt. In a medium bowl, mix together melted butter and sugars. Stir in egg and vanilla extract. Next, stir in the pumpkin puree until well-combined. Add the sifted dry ingredients, and stir just until combined. Finally, stir in the white chocolate, butterscotch chips, and pecans.

Pour the batter into a greased 9x13-in baking dish, and bake at 350 degrees for 35-40 minutes, or until a toothpick inserted into the center comes out clean.

Wednesday, July 21, 2010

White Chocolate Blondies...ish

So, I went to a family reunion last weekend. I was debating between a couple different desserts (brownies and blondies, incidentally) and couldn't decide which one to make, so I made both. The first one was gone so quickly that I didn't even get a chance to take a picture. And I followed the recipe to a "t" (crazy, right?!), so you might as well just check it out from the original source...S'mores Brownies from Lemons & Love. They were amazing--a hit with kids and adults alike. Please do yourself a favor and make them.

The second recipe was somewhat less successful. I had high hopes for these blondies, but they came out more like a dense cake than the chewy, cookie-like blondie texture that I'm used to. I didn't realize this until I was already at the reunion, so it was too late to salvage them for that...so instead, I brought home the (numerous) leftovers and frosted them with a nice glaze to try to play up and take advantage of that cake-like texture. It worked. They're now tasty spiced orange white chocolate pound cake squares. Yum. Is it a true pound cake? No. But it's a dense cake, and I can't think of a better name for it. Here's the new and improved recipe...

Spiced Orange White Chocolate Pound Cake Squares (adapted from Allrecipes.com)

  • 16 oz. white chocolate chips
  • 1 c. plus 2 Tbl butter (divided), softened
  • 1 Tbl. vanilla extract
  • 1 Tbl. orange extract
  • Zest of 1 orange
  • 1/2 Tbl. rose water
  • 1/2 Tbl. cardamom
  • 2/3 c. white sugar
  • 4 eggs
  • 2 1/2 c. all-purpose flour
  • 2 c. powdered sugar
  • Juice of 1/2 orange

Melt the white chocolate and 1 c. butter together in the microwave in a large bowl. Add vanilla extract, orange extract, orange zest, rose water, and cardamom to the melted white chocolate. In a separate bowl, whisk eggs until foamy. Stir eggs into chocolate mixture, then stir in flour just until combined. Pour mixture into a greased 9x13 pan, and bake for 25 minutes at 350 degrees, or until toothpick inserted in the middle comes out clean. Cool, then cut into 24 squares.

To make icing, cream together 2 Tbl. butter with the orange juice. Add powdered sugar until the mixture is spreadable. Frost each cake square with a thin layer of the icing.