Tuesday, September 28, 2010

Orange Cranberry Bread

This is somewhat of a departure from desserts. But, it's baked, so I think it can still be posted. I made some orange cranberry muffins for my mom a while back, but I wasn't that pleased with the texture of them, and I still had some leftover ingredients. I always seem to have more luck with yeast breads than quick breads (go figure, right???), so I thought of making an orange cranberry bread. I looked at this cinnamon raisin bread recipe for inspiration, but I HEAVILY adapted it and made enough changes that I feel comfortable labeling this an original recipe. This bread is moist, light in texture, and heavy on flavor! It's nice and hearty because of the copious add-ins and would make a great breakfast! Please enjoy!


Orange Cranberry Bread (a Blondie original)

  • 1/3 c. warm water (110 degrees F)
  • 4 Tbl. honey, divided
  • 2 tsp. yeast
  • 3 Tbl. butter, softened
  • 1 egg
  • 1/4 tsp. salt
  • 2 2/3 c. bread flour, divided
  • 1/2 c. plus a little more thawed orange juice concentrate, divided
  • Ground cinnamon
  • Ground cloves
  • Ground nutmeg
  • 1/4 c. brown sugar
  • 1/2 c. chopped walnuts
  • Handful dried cranberries
  • Handful golden raisins
  • Melted butter (optional)

Mix the warm water with 1 Tbl. honey in a large bowl. Sprinkle the yeast over this and let proof until foamy, about 5-10 minutes.

Whisk remaining honey, butter, egg, and salt into the yeast mixture until pretty thoroughly mixed. If you still have some lumps of butter, that’s ok. Add 1 c. bread flour, and whisk until the mixture is smooth and no lumps remain. Whisk in 1/2 c. thawed orange juice concentrate. Using a spoon (it’ll get too thick to whisk), stir in remaining flour a little at a time until dough pulls away from the edge of the bowl. Turn it out onto a lightly-floured surface and knead until smooth and elastic, about 10 minutes, adding more flour as necessary to prevent sticking.

Coat a large bowl with cooking spray. Form your dough into a ball and coat it in cooking spray. Put the dough into the bowl and cover the surface of the dough with plastic wrap. Let rise in a warm place for 1 hour, or until doubled.

On a lightly-floured surface, roll out the dough into a rectangle that is 1/2-in. thick and 9-in. wide (it will end up being about 11 to 12-in. long). Brush the dough with a little more thawed orange juice concentrate, just to moisten it. Sprinkle liberally with cinnamon, lightly with cloves, and very lightly with nutmeg. Sprinkle the brown sugar over the dough. Sprinkle the dough with the walnuts, cranberries, and raisins, distributing them evenly. Roll up dough jelly-roll style, TIGHTLY, folding in the ends. Place in a well-greased 9x5-in. loaf pan. At this step, you can either put it in the fridge to rise overnight, or put it in a warm place to rise for an hour. If you let it rise overnight in the fridge, be sure to let it sit at room temperature for about a half hour to warm up before baking.

Bake at 350 degrees F. for 30 minutes, or until the bread is lightly browned on top and sounds hollow when knocked. You can brush the top with melted butter at this point to ensure a soft crust, but my house is super humid and things always get soft anyways, so I didn’t.

This would also be fantastic topped with a glaze of powdered sugar and orange juice concentrate, but it's not necessary.
Friday, September 24, 2010

Sour Cream Pear Pie

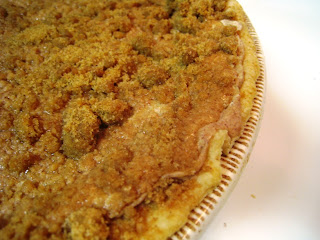
Yes, I know that sounds weird. I got lots of skeptical looks when I told people there was sour cream in the pie. But once they tried it, they were converted into believers! This pie was deliciously creamy. It was similar in flavor to apple pie, but ever-so-slightly (and delightfully!) different. So go ahead, take a risk, and try it! I promise you'll be pleasantly surprised!


Sour Cream Pear Pie (adapted from Allrecipes.com)

  • 1 unbaked 9" pie crust (I used Martha's Perfect Pie Crust, as posted by Apple A Day)
  • 8 small to medium pears, thinly sliced (it would be nice to peel them if you are less lazy than me)
  • 1/3 c. granulated sugar
  • 3/4 c. all-purpose flour, divided
  • 1 c. sour cream
  • 1/2 tsp. lemon juice
  • 1/2 tsp. vanilla extract
  • 1/2 tsp. almond extract
  • 1 Tbl. cinnamon, divided
  • 1/4 c. packed brown sugar
  • 2 Tbl. butter, melted

Put your pears in a gallon-sized zip-top plastic bag. Add granulated sugar, sour cream, lemon juice, vanilla and almond extracts, 1/2 Tbl. cinnamon, and 2-4 Tbl. all-purpose flour, depending on how juicy they are. Zip the top (double-check to make sure it's closed, because you don't want to accidentally dump out half your pears! Not that this happened to me, or anything....), and shake and massage around until everything is thoroughly mixed. See how we cleverly avoided dirtying a bowl to mix that up???

Line a 9" pie plate with the crust, trimming the excess from the edges. Dump the pear mixture into the pie plate, along with as much of the juices as you can get out of the bag. Don't worry about making it pretty, because we're going to cover it up with a crumb topping.

Mix together 1/2 c. all-purpose flour, the brown sugar, 1/2 Tbl. cinnamon, and the melted butter until you have pea-sized crumbs. Sprinkle this generously over the top of the pie. Bake at 400 degrees F for 10 minutes, then turn down the heat to 350 degrees F, and bake another 45 minutes. Cover the crust with foil for the last 10 minutes or so, if needed, to prevent over-browning.

Wednesday, September 22, 2010

Lego Cake!

Remember my piano cake? Well, I've made another foray into shaped cakes. This one was for my friend's son's 5th birthday. He apparently really likes Legos (and really, who can blame him? I used to love those things!), so his party was Lego-themed. Naturally, he needed a Lego-shaped cake. I followed this tutorial from Betty Crocker, and it worked out very well! I used my grandmother's chocolate cake recipe (ever-so-slightly adapted) and a basic American buttercream frosting. I also tried out my Americolor gel food colorings for the first time, and they worked great to get bright, vibrant colors for the frosting!

My Grandmother's Chocolate Cake (slightly adapted)

  • 1/2 c. unsalted butter
  • 2 oz. semi-sweet chocolate
  • 2 eggs
  • 1 1/2 c. granulated sugar
  • 1 1/2 c. flour
  • 1/4 c. cocoa powder
  • 1 1/2 tsp. cream of tartar
  • 1 tsp. salt
  • 1/2 c. milk
  • 1 tsp. vanilla
  • 1/2 c. boiling water
  • 1 1/2 tsp. baking soda

Melt the butter and chocolate together in a large, microwave-safe bowl. Stir to combine, then mix in the sugar. Next, beat in the two eggs. Separately, sift together flour, cocoa powder, cream of tartar, and salt. Add this to the chocolate mixture, alternating with the milk and vanilla. Finally, add the baking soda to the boiling water OVER THE BOWL (mixture will foam up), and stir it in just until combined.

Pour the batter into a greased 9x13" pan (I also lined the bottom with parchment paper, just to ensure that there wouldn't be stickage!), and bake at 350 degrees F for 30-35 minutes, or until toothpick inserted into the center comes out clean. Let cool.

Magnolia Bakery Vanilla Buttercream (from Martha Stewart)

  • 2 sticks butter, softened
  • 6 c. powdered sugar
  • 2 tsp. vanilla extract
  • 1/4 c. milk
  • Gel food coloring

Beat the butter for a few minutes, until nice and creamy. Add the powdered sugar a little at a time, alternating with the vanilla and milk, until the desired consistency is achieved. You may need more milk or more powdered sugar. Next, divide the frosting equally into three separate bowls. Take one of those bowls, and transfer half of the frosting from it to a new bowl. You should now have four bowls, two of which contain twice as much frosting as the other two. Add food coloring of your choice to each bowl, and stir to combine.


To assemble cake:

  • 1 9x13" cake
  • 1 batch of Magnolia Bakery Vanilla Buttercream
  • 1 bag jumbo marshmallows

Remove cooled cake from the pan and freeze for an hour. Put it on a clean surface with the long side facing you. Cut it width-wise into three equal rectangles--each should be about 9" x 4". Take one of these rectangles, and cut it in half width-wise, so you have two equal squares. You should now have two rectangles and two squares (do the frosting proportions make sense, now?). The squares will be 4-peg pieces, and the rectangles will be 8-peg pieces.

Frost a thin crumb-coat onto each piece, using a different color for each piece of cake (use the colors you have more of for the rectangular pieces and the colors you have less of for the square pieces). Return the cake pieces to the freezer for another hour to set the crumb coat.

Put the final layer of frosting onto each of the pieces, smoothing it out as much as possible, and reserving a little frosting of each color. Now would be the time to arrange your pieces on a cake board, stacking them (or not) however you like.

Take the bag of jumbo marshmallows, and snip a few in half so that they will be shorter. Spear one on a fork. Using your reserved frosting, frost the top and sides. Carefully transfer it to the cake piece of the same color, and fix up the frosting, if need be. Remember, you need four for the square pieces and eight for the rectangular pieces (assuming they are all unstacked--this will need to be modified if you are stacking pieces). Repeat until you have put sufficient pegs on all the cake pieces. Then, present it to a 5-year-old boy, and make his day! :)

Monday, September 20, 2010

Another Pictureless Post...

Sorry guys, another pictureless post. This is the last one, I promise. But I really wanted to share this one--it's a Blondie original! And that made me excited. I had friends over to watch a movie (Sherlock Holmes--very good!). I made a small selection of goodies for them to munch on, including a veggie tray with homemade hummus, Joelen's crab rangoon appetizers, and these pear cigars. I have no idea what to call them, but pear cigars sounds as good as anything else. They were light, tasty, and not too sweet!

Pear Cigars (A Blondie original!)

  • 4 medium to large pears
  • 1 Tbl. lemon juice
  • 1/2 tsp. ground ginger
  • 3 Tbl. honey
  • 2 Tbl. cornstarch
  • 1 package filo dough, thawed
  • 1/2 stick butter, melted

Slice the pears up nice and thinly (a mandoline works well for this). Peeling them before slicing would probably be nice, but I was lazy and didn't do it, so feel free to omit that step. Put about 1/2 in. of water in the bottom of a medium saucepan, and add the pears. Add lemon juice, ginger, and honey, and stir to evenly coat pears. Bring to a boil, then reduce the heat and simmer covered for about a half hour, or until pears are tender. Mix the cornstarch with about 2 Tbl. cold water until dissolved and smooth. Add the cornstarch slurry to the pears, and stir to combine. Simmer 1 minute longer, or until thickened. Let the pear mixture cool.

Take one sheet of filo dough, and brush with melted butter. Top it with another sheet of filo dough. Brush with melted butter again. Fold the filo stack in half, like a book (hint: the filo stack should NOT be long and skinny...if it is, you folded it in half the wrong way. Unfold and try again). Brush with butter again. Spoon 2-3 Tbl. of pear mixture along the folded edge. Do NOT go all the way to the edge with the filling. Roll the filo dough over the pear mixture once, then fold in the sides (like wrapping a burrito) and continue rolling until you reach the end of the filo sheet. Your cigar should have all the ends tucked in so as to minimize the chance of tasty filling leaking out. Place the cigar seam-side down on a greased baking sheet. Repeat this whole process until you've used all the pear filling. It should make around 18 cigars.

Bake the cigars at 375 degrees for 30-35 minutes, or until golden. Enjoy!

Thursday, September 16, 2010

Thumbprint Cookies

I have a couple posts that I've been debating the wisdom of posting. One, macarons, is because while tasty, they in no way resembled the pretty macarons you see at bakeries, so I don't really feel qualified to give instructions on how to make them. The others are because I don't have pictures for them. But then I realized that my pictures are pretty crappy, anyways, so I don't think you'll miss them that much. These thumbprint cookies are too tasty not to make, even without a picture! I mean, the recipe is from Ina Garten--do you need any more proof that it will be good???

I did the backstage catering for a friend at an event last weekend, and these thumbprint cookies were one of the desserts I made. They were a big hit! The other dessert was David Lebovitz's Chewy Dense Brownies. I told you it was a new favorite recipe! Remember how good they were in S'mores Brownies? Turns out, they're just as good (if not better!) if you make the brownie base, stir in a package of Reese's chips, and top them off with a drizzle of melted peanut butter candy melts after they're baked and cooled. Oh yes. I highly encourage trying that!

Thumbprint Cookies (from Ina Garten)

  • 3 sticks unsalted butter, softened
  • 1 c. sugar
  • 1 tsp. vanilla extract
  • 3 1/2 c. all-purpose flour
  • 1/4 tsp salt
  • 1 egg beaten with 1 Tbl. water
  • 7 oz. unsweetened flaked coconut
  • Various flavors of jam

Cream together the butter and sugar. Beat in vanilla. Sift together salt and flour, then add this to the butter/sugar mixture. Mix just until it comes together. Turn the dough out onto a piece of plastic wrap. Pat it into a flat disk, then wrap up in the plastic wrap and refrigerate for 30 min.

Roll dough into balls approximately 1 1/4" in diameter. Roll in the egg wash, then roll in coconut. Place the ball on a greased baking sheet. Using your thumb, press a nice, DEEP indentation into the cookie. These flatten out a lot when baking, so I recommend making the sides of the well pretty high! Once you've got all the cookies formed, pipe jam into the wells of the cookies. Use your favorite flavors--I used lemon marmalade, cherry jam, apricot jam, and some strawberry pie filling that I had left over. Refrigerate for another 30 min (I'm adding this step in the hopes of preventing the cookies from flattening out too much). Bake for 20-25 min. at 350 degrees F.

Next time I make these, I'm totally making a rum-pineapple filling for them so they'll be pina colada cookies!!!

Wednesday, September 8, 2010

Tiramisu

My dance studio recently had a big party that was catered by a local pasta shop. They wanted to charge something like $2.75 per person to include dessert, and I thought I could probably do it for less than that--not to mention, it would probably taste better, too! I wanted to keep with Italian food to match dinner, and I wanted something that could be assembled ahead of time. Tiramisu seemed to fit the bill perfectly! No one believed me that I made this--they all thought it was too professional-looking, too perfect-tasting, and had to be from the catering company. Nope! And you, too, can make a delicious, impressive tiramisu. Read on for the recipe! (My apologies for the pictures, but tiramisu is not particularly photogenic)


Tiramisu
(adapted from Allrecipes.com)

  • 9 egg yolks
  • Heaping 1 c. granulated sugar
  • 1 c. milk
  • 2 c. heavy whipping cream
  • 1 tsp. vanilla extract
  • 1 1/2 lbs mascarpone cheese, at room temperature
  • 1 1/2 c. strong coffee, at room temperature
  • 6 Tbl. rum
  • 3 (3-oz) packages of soft lady fingers
  • Cocoa powder, for dusting

Bring about an inch of water to a boil in a medium pot. In a stainless steel bowl, combine egg yolks, sugar, and milk, and whisk until combined. Put the bowl on top of the pot of boiling water, making sure the water does NOT touch the bottom of the bowl. Cook, stirring constantly, until mixture thickens and becomes lighter in color (and/or reaches 160 degrees F). Remove bowl from heat, press zabaglione through a fine mesh sieve to remove lumps, and cover with plastic wrap, pressing the plastic wrap against the surface of the zabaglione to prevent a skin from forming. Refrigerate 1 hour. Then, fold the mascarpone into the zabaglione until combined.

In a medium bowl, beat whipping cream with vanilla until stiff peaks form. Refrigerate until ready to use.

In a small bowl, combine coffee and rum. Line a 9x13" baking dish with a single layer of lady fingers. Drizzle about half of the coffee mixture over them. Spread with half of the mascarpone/zabaglione mixture, then spread with half of the whipped cream. Top with a second layer of lady fingers. Drizzle with remaining coffee mixture. Spread with remaining mascarpone/zabalione, then spread with remaining whipped cream. Refrigerate at least 24 hours, and preferably 48 hours, before serving. Before serving, use a mesh sieve to sift a fine dusting of cocoa powder over the top.


Notes: this was amazing. Terrible for you, rich, delicious, time-consuming, and decadent. I can't stop raving about it--seriously! The best part is that it's not overly sweet. It is absolutely essential to make this two days before serving it--the flavors all meld into a fantastic conglomeration of taste. The original recipe said to cook the egg yolks over direct heat and boil them, and--against my better instincts--I followed it. I ended up with a somewhat grainy zabaglione because the eggs started to scramble. I have updated the directions to reflect a more gentle cooking method. The original recipe also said to dip the lady fingers in the coffee mixture, but they fell apart on me doing that, so I used the drizzle method instead. Oh, and speaking of the coffee, use a nice, strong, rich-flavored coffee. I'm not a coffee drinker, so I used instant coffee that my roommate had on hand--I think the flavor would have been better with better coffee. One last advantage to this recipe--the zabaglione is cooked, so there's no raw eggs in sight, like there are in a lot of tiramisu recipes!

Sunday, September 5, 2010

S'mores Brownies

A while back, I made s'mores brownies for a family reunion, but I only mentioned it in passing because I a) followed the source recipe exactly, and b) wasn't completely 100% satisfied with how they turned out (sorry, Melissa!). But they had enough potential to be worth revisiting the idea. I knew there would be a lot of kids in attendance at my parish's annual picnic, and since the s'mores brownies had been a big hit with the kids at the family reunion, they seemed like a logical choice. For the record, this latest batch was both kid- and adult-approved! And I now have a new favorite brownie recipe. Yum!


S'mores Brownies (brownie base from David Lebovitz via Smells Like Home)

  • 1/2 box graham crackers, thoroughly crushed
  • 3 sticks butter, divided
  • 8 oz. semisweet chocolate chips
  • 2 1/2 c. sugar
  • 4 eggs
  • 2 tsp. vanilla extract
  • 1 c. flour
  • 1/2 bag mini marshmallows

Preheat oven to 350 degrees F. Put one stick of butter in a 9x13" pan, and put it in the oven to melt while the oven preheats. Meanwhile, pulverize the graham crackers in a food processor or with a rolling pin and elbow grease. Add the graham cracker crumbs to the melted butter in the pan, and stir until all crumbs are moistened. Press crumbs evenly over pan to form a crust. Bake in preheated oven for 10-12 minutes, or until mostly firm. Cool.

Meanwhile, combine remaining 2 sticks butter and semisweet chocolate in a large, microwave-safe bowl. Zap in 30 second-intervals on high power until chocolate and butter are melted. Stir in granulated sugar, then stir in eggs--one at a time--and vanilla. Stir in flour just until mixed in.

Spread batter over the graham cracker crust, and bake at 350 degrees F for 45 minutes, or until mostly done (toothpick inserted 1" from edge should have moist crumbs on it). Scatter mini marshmallows over top, and bake for another 5-7 minutes, or until marshmallows are puffed and starting to brown on top. If they don't brown up nicely, you can turn on the broiler, but watch them closely--they only take a minute or less to brown up that way!

These were fantastic, and I cannot stop raving about this brownie recipe! It's chewy and fudge-y and rich and decadent! In short, everything I love in a brownie. And it beats the pants off Duncan Hines!

Wednesday, September 1, 2010

Eat, Pray, Love Party: India

Ok, I've kept you waiting long enough. It's about time I coughed up the recipe for Nariyal Burfi, otherwise known as Indian Coconut Fudge. Truth be told, I was tweaking it. You see, I made the recipe (more or less) as directed. And it was tasty and delicious. But after about 5 minutes of being out of the fridge, it turned into a sticky gooey mess. Now, the obvious solutions to this problem were to a) always eat it straight out of the fridge or b) coat it in chocolate. Read on to see which I chose! ;)


Nariyal Burfi (Indian Coconut Fudge, adapted from Allrecipes.com)

  • 4 c. unsweetened dried flaked coconut
  • 2 (14-oz) cans sweetened condensed milk
  • Scant 1 c. sliced almonds
  • 1 Tbl. ground cardamom
  • Several dashes of rose water
  • 1 lb. chocolate coating bark

Combine the coconut and sweetened condensed milk in a large, microwave-safe bowl. Microwave on high for 8 minutes, stirring every 45 seconds, or until the mixture is thoroughly hot and bubbling. Remove from microwave, and stir in almonds, cardamom, and rose water. Pour into a well-greased 9x9" pan, and spread it out evenly. Refrigerate until firm (1-2 hrs.).

Cut into small squares (this stuff is rich!), and spread them out on a piece of waxed paper. Toss in the freezer for a few minutes to get nice and firm. Meanwhile, microwave the the chocolate bark in a small, microwave-safe bowl until melted, stirring every 30 seconds. Dip each square of fudge into the melted chocolate until completely covered, then transfer to a chilled baking sheet to harden. Enjoy!

I love the combination of flavors in the fudge. It's a little unexpected, because with the chocolate and coconut, you're expecting more of a traditional Almond Joy-type flavor, and instead you get the floral tastes of cardamom and rose water. But who doesn't enjoy a change of pace from time to time? And it certainly fit the bill for an Indian-inspired dessert! I hope you enjoyed the posts from my Eat, Pray, Love party--I know I had fun cooking, and my friends had fun eating!